PREFACE
Thank you very much for purchasing and using this series of optical time domain reflectometers.
This manual mainly contains the common operation and maintenance information of the instru
ment, as well as the common troubleshooting guide and other information. In order to facilitate
your use, please read the contents of this manual carefully before operating the instrument, and
follow the instructions of this manual correctly.
This manual is only used with this instrument. Any company or person is allowed to tamper, copy
and disseminate the contents of this manual for commercial purposes without the authorization of
the company.
The contents of this manual are subject to change without notice. If you have any questions,
please call the supplier, we will provide you with the best service!
Due to the need of design improvement, the contents are subject to change without notice.
Summary
This series of OTDR is a multi-functional optical measuring instrument, which OTDR, event map, visual fault location,
RJ45 Test(cable line length 、sequence test、cable tracking),optical multimeter(Laser Source、optical loss test),optical power
meter, end face detection,and other functions. It has touch screen and heys. It is the right assistant for optical cable construc
tion, installation and maintenance, project acceptance and on-site repair
Warning
When using the instrument, do not look directly at the laser output port or the end of the optical fiber with your eyes, avoid
eye damage!Dual wavelength testing of 1310nm&1550nm is prohibited online, as forced use may cause damage to internal
components of the instrument!Any change or modification not explicitly permitted in this manual will deprive you of the right
to operate the equipment. To reduce the risk of fire or electric shock, do not expose the equipment to thunderstorm or humid
environment. In order to prevent electric shock, please do not open the shell. It must be repaired by qualified personnel
designated by the manufacturer.
Attentions
Battery: The battery is a special polymer lithium battery, the charging voltage is 5V/2A, and the charging temperature
range is -5℃~+45℃. When the ambient temperature is too high, the charging will automatically terminate. The battery should
be charged every one month to avoid long storage time and failure of battery due to self discharge. The temperature range of
battery during long-term storage is: - 20 ℃ ~ 50 ℃.
Please use the special adapter attached with the instrument box and use the external power supply in strict accordance
with the specifications, otherwise the equipment may be damaged.
End Face Cleaning: Before testing, clean the end face of the tested fiber joint with alcohol cotton.
LCD screen: The display of this series of instruments is 4.3 inch color LCD. In order to maintain good viewing effect, please
keep the LCD screen clean. When cleaning, wipe the LCD screen with soft fabric.
Attentions
Guarantee description:The whole machine is guaranteed for 36 months. The battery, charging adapter and optical
interface consumables are guaranteed for 6 months. The warranty date shall be postponed one month from the date of
manufacture.
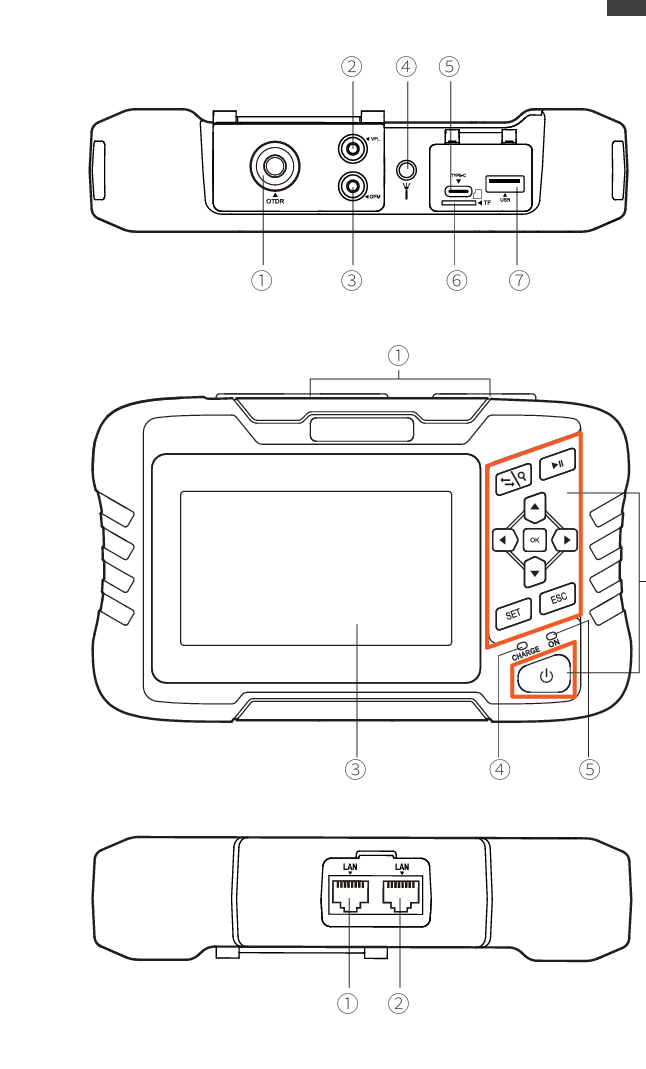
Host
Top
① OTDR port
② VFL port
③ OPM port
④ Flashlight
⑤Type-C
⑥ TF(Mico SD)card
⑦ USB
Main view
① Dust cover
② Function keys
③ 4.3 inch color LCD
④ Charging indicator
⑤ Power on status indicator
Bottom
① RJ45 Sequence test port
② RJ45 Cable line length/cable tracking port
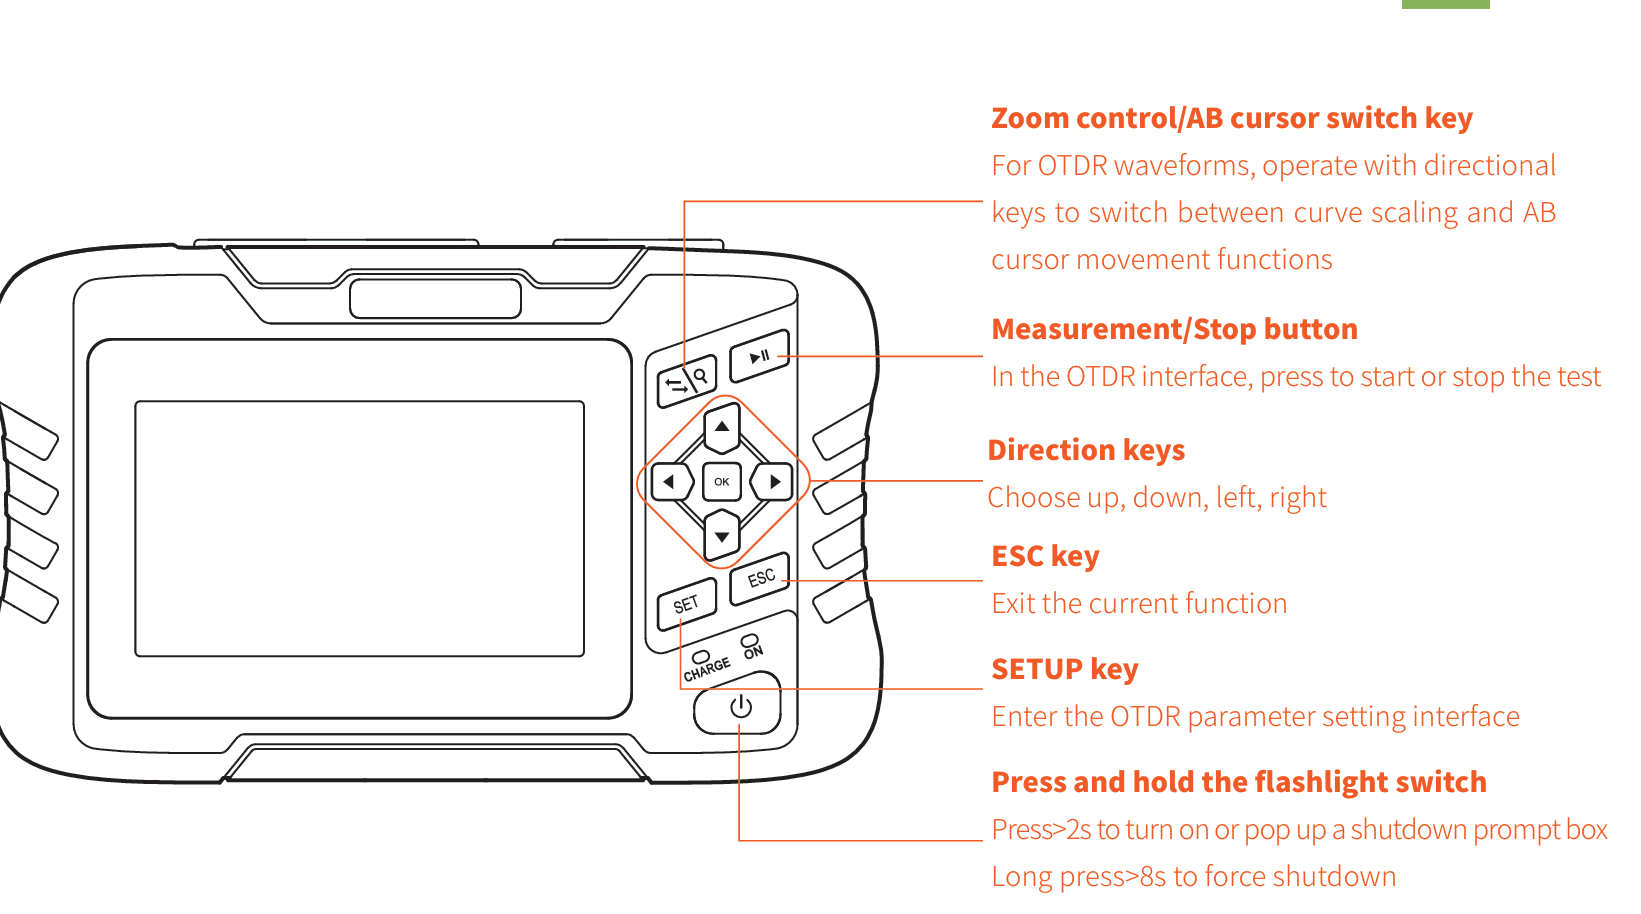
Function buttons
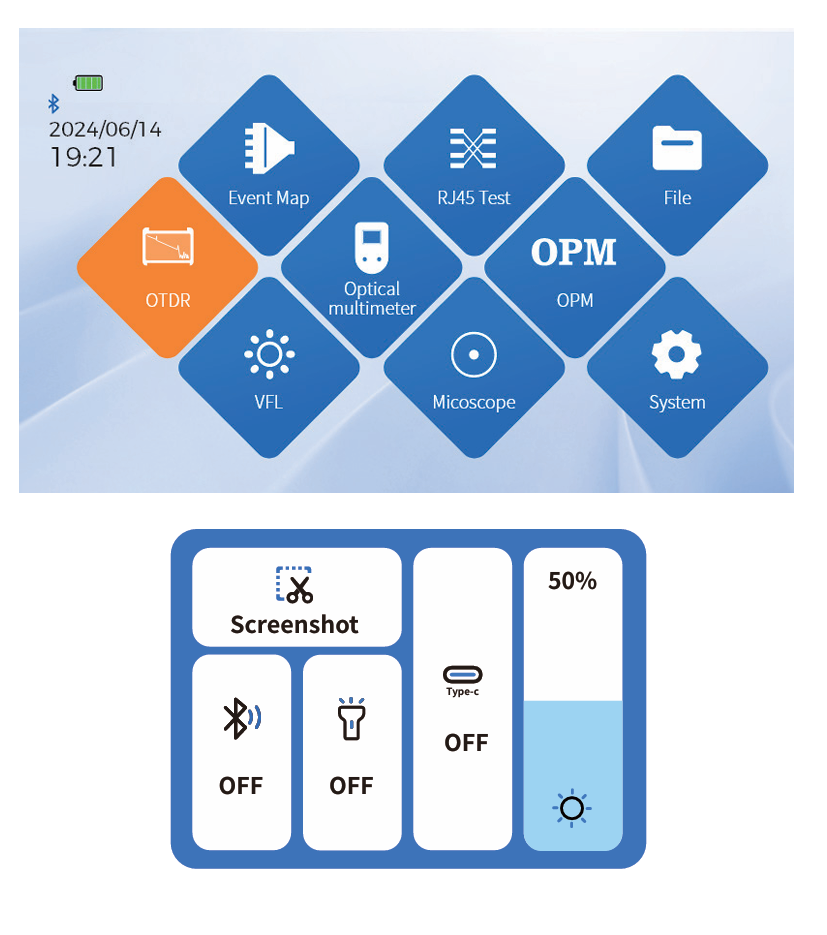
Main interface
After booting up, enter the main menu with a total of 9
functional modules. Press the directional keys to select the
module, then press the "OK" key or directly press the func
tion icon to enter the corresponding functional interface
Press the "Shortcut Menu" to enter the operation interface,
and press different icons to achieve the corresponding
operation functions.
Key operation:Select the function menu up, down, left,
right, and OK to enter the function item.
Screenshot: Capture the current interface, and the image
will be automatically saved inside the instrument. The file
name is the time when the screenshot was generated